f/10
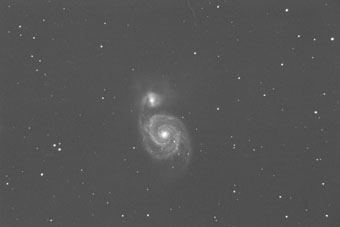
f/6.5
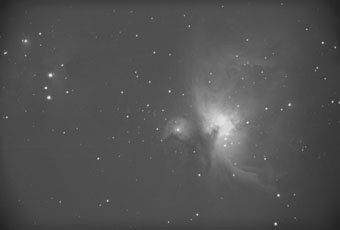
f/5.5
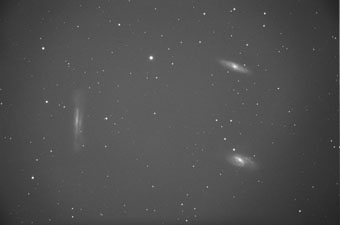
f/4
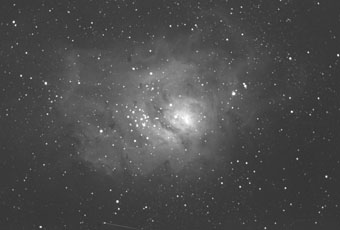
I purchased my Lumicon Giant Easy Guider from F.C. Meichsner in Boston in November 1996. Since then I have had an opportunity to use it in all of its various modes of operation. The following is a report of my experiences.The equipment primarily used with the GEG consists of the following:
- Meade LX200 10" f/10 SCT
- Nikon F2 + DW2
- Lumicon DS filter
- SBIG ST-4 Autoguider
I have not used the GEG with any other equipment, except that I used it briefly with the Pictor 201XT Autoguider and a Nikon FM2 camera body. It appeared to work successfully with both of these. I have heard that the GEG does not work successfully with all SCTs, such as the LX200 8", however I believe that it is intended to work with the Celestron-11 and Celestron-14. From this it appears that it should also work with the Meade LX200 12", but I have not seen any reports to confirm this.
The Lumicon Giant Easy Guider is both an Off-Axis Guider and a Focal Reducer in one instrument. As it's name implies, it is a large and substantially constructed device which weighs nearly 2-1/2 lbs with the lens installed. It has a large 80mm focal reducing lens which can be used in two different positions, or it can be removed entirely (for the f/10 'straight through' mode). The focal reducing lens yields crisply defined star images to the edge of the 35mm frame. Star images at the edge of the field have noticeably less coma than without the lens installed. As an Off-Axis Guider, it is extremely rigidly constructed and there is no potential for any flexure problems.
Advantages
- You will notice that on the rear cell of your LX200 you have a 3-1/4" to 2" adapter. Even if you do not have a GEG, it is very interesting to remove this - it unscrews counter-clockwise. If you look inside the baffle tube of the LX200 you will see that the baffles, and hence the available light cone, is some 2" in diameter. Next, if you inspect the adapter you will notice that the exit tube has an internal diameter of approximately 1-1/2". Hence this adapter cuts off approximately 44% of the light cone that would otherwise be reaching the film in your camera. The breakthrough with the GEG is that it does not use this adapter and the associated light restriction. The GEG has its own 3" fitting and has a large 80mm focal reducing lens to ensure that the full extent of the exit light cone is captured. In my view this is the biggest single advantage of the GEG, because it means that the full extent of the 35mm frame is exposed during astrophotography.
- Permits operation of the f/10 LX200 at a total of four different f/ratios: f/10, f/6.5, f/5.5, and f/4, with full 35mm frame coverage in all four modes. See more under the 'Mode Report' (below).
- Both rotational and axial movements of the prism are easily and quickly achievable, allowing a guide star to be selected in any orientation, and within a substantially wide variation of radial distances from the subject. In more than six months' use I have always managed to find a suitable guide star, without any shift being required of the subject from its optimum position on the film plane.
- The camera may be rotated independently of both the guider and the telescope, allowing optimum composition of the subject. The image of M65, M66, and NGC 3628 (images section) is a good example of how a difficult subject may be optimally composed. To compose this image I firstly made rotational and axial adjustments to the guider to locate a guide star, then freely rotated the camera while leaving the guider untouched.
- Complete absence of prism shadow from all images in all modes.
- Excellent filter receptacle is integral with the camera adapter, allowing filtration of the light entering the camera only. This applies to all four modes of operation.
- In f/6.5 mode, permits autoguiding at f/10, while imaging at f/6.5
Disadvantages
The mere fact that the GEG is an OAG and Focal Reducing instrument means that it is bound to be a compromise, to some degree, to what some will consider ideal. For some, a separate guidescope will be considered the only optimum way of guiding, and an intrinsically fast instrument the only way to achieve fast f/ratios. Bearing this in mind, the following points apply:
- Guide star brightness is lower than with a separate guidescope. This applies to any OAG and is because the inherent coma at the edges of the optical system produces a more diffuse star image than a centrally placed image. Even so I regularly guide on mag 10 stars using just 3 secs exposure time with the ST-4. In fact I've never yet had to go above 3 secs. Using the lens in front of the prism (f/5.5 and f/4 positions) produces a noticeably brighter and crisper star image. In this mode I can guide on mag 11 stars using just 3 secs exposure time on the ST-4.
- Some vignetting is present in all images when using the GEG with the lens installed, owing to the focal reduction that takes place. The degree of vignetting increases in proportion to the increase in speed. See more below under 'Vignetting'.
- Switching between the four modes (f/10, f/6.5, f/5.5, f/4) may involve both a lens change and a change to the shims for the front of the prism housing recess. These tasks (especially the latter) are slightly fiddly and are best performed indoors under good illumination. More on this under the Mode Report.
- A very slight degree of colour fringing (chromatic aberration) is visible around brighter star images, however this may be no more than is normally produced by a high quality refractor.
As a straight Off Axis Guider, the GEG is superlative, and I cannot think of any disadvantages.
Mode Report
This is a detailed report on each of the four modes of GEG operation.
Notes:
- F Ratio calculations: In the past I have unfairly critiscised Lumicon for quoting optimistic f/ratios for the GEG. In fact this is not true - I was neglecting two facts: the intrinsic f/ratio of my LX200 is actually f/10.7 (rather then the specified f/10), and the GEG itself adds a further 115mm to the focal length, bringing the system f/ratio to f/11.2. If the system f/ratio had been f/10 to start with, then the quoted Lumicon figures would be pretty much correct. F/ratios in all modes were calculated as accurately as possible by measuring the distance between star points at the extreme edges of the 35mm frame.
- Lens position: More or less self-explanatory. This is explained in more detail in the Lumicon literature.
- Eyepiece extension tube: this is the 1.3" - 4.5" extension tube sold by Lumicon. I strongly recommend using this tube, since this single tube works well for both f/6.5 and f/4 modes. It is also of high quality and has two thumbscrews to ensure rigid coupling. I have another (cheaper) extension tube which does not work well in one mode and does not work at all in the other.
- Shims for front of prism holder: for both f/5.5 and f/4 modes, shims are required on either side at the front edge of the prism housing recess. These are best made from small squares of electrical insulating tape. I found that I needed to use a total of three shims (of electrical insulating tape stuck together). This is described in the GEG literature and is to ensure that guide stars are readily visible throughout the middle range of axial movement of the OA tube.
- Camera 2" extension tube: this is effectively an extension of the f/5.5 mode - by inserting the 2" extension tube into the rear aperture of the GEG, the camera is moved 2" further away, and f/4 is achieved.
- Vignetting: this is a subjective report. For more detail on vignetting, please see the section entitled Vignetting (below).
Mode Report - f/10:
- Actual f/ratio on my LX200: f/11.2
- Image scale (35mm format): 43' x 29'
- Lens removed.
- No eyepiece extension tube required.
- No shims required under front of prism holder.
- Camera 2" extension tube not required.
- No vignetting.
- OA image: as basic instrument
- Camera image: as basic instrument
Mode Report - f/6.5:
- Actual f/ratio on my LX200: f/7.5
- Image scale (35mm format): 65' x 43'
- Lens inserted in 'rear' position (behind OA prism).
- Eyepiece extension tube required (approx 3" of extension).
- No shims required under front of prism holder.
- Camera 2" extension tube not required.
- Slight vignetting.
- OA image: as basic instrument
- Camera image: excellent - crisply defined star points over virtually the entire field
Mode Report - f/5.5:
- Actual f/ratio on my LX200: f/6.5
- Image scale (35mm format): 75' x 50'
- Lens inserted in 'front' position (in front of OA prism).
- No eyepiece extension tube required.
- Shims required under front of prism holder.
- Camera 2" extension tube not required.
- Moderate vignetting.
- OA image: Coma much reduced - noticeably brighter and crisper star images
- Camera image: excellent - crisply defined star points over approximately 85% of field
Mode Report - f/4:
- Actual f/ratio on my LX200: f/5.8
- Image scale (35mm format): 84' x 56'
- Lens inserted in 'front' position (in front of OA prism).
- Eyepiece extension tube required (approx 2" of extension).
- Shims required under front of prism holder.
- Camera 2" extension tube required.
- Moderate vignetting.
- OA image: Coma much reduced - noticeably brighter and crisper star images
- Camera image: good - crisply defined star points over approximately 70% of field
Vignetting
Any vignetting comparison between different f/ratios is only valid if the telescope setup, area of sky being imaged, sky conditions, and film are identical throughout the comparisons and only the exposure time is adjusted to compensate for the different f/ratios. Thus far it has not been possible to commit the time necessary for such a test. The images presented below, although taken at the indicated f/ratios, fall short of the above criteria in at least one respect, and should therefore only be used as a rough guide.
Although the images below truly represent the GEG in all four modes of operation, they were taken in very different conditions. To try to compensate for the differing negative densities I used entirely the default settings of the Sprintscan 35 Plus for all scans - in other words I tried to let the Sprintscan do the compensation. The raw images were then converted to greyscale in Photoshop - the reason for this was to remove the distraction of colour from the images so as to make the vignetting more evident. Finally I adjusted the brightness of the images so that the un-vignetted part was a consistent 'mid-grey' across all images - this was by eye only, so minor inconsistencies may be seen.
f/10 - an unfiltered three hour exposure on hypered PJM-2 taken in dark sky conditions with very little sky fog. There is no vignetting in this mode.
f/6.5 - an unfiltered 30 minute exposure on hypered PJM-2. This negative is significantly more dense than the f/10 negative because the film was very over-hypered (this was when I was still learning to hyper) and there was much more sky fog owing to light pollution. The vignetting shown in this image is definitely emphasised over what you would normally expect to see, which I think was due to a combination of the above factors. In this mode you would normally expect to see a slight darkening only at the extreme corners of the frame with no detectable vignetting across the rest of the frame.
f/5.5 - an unfiltered 2 hour exposure on hypered PJM-2 taken in dark sky conditions with very little sky fog. This negative is slightly more dense than the f/10 negative. The vignetting shown in this image is very representative of what you would expect to see in average conditions in this mode.
f/4 - a 1 hour exposure on hypered PJM-2 taken in dark sky conditions but with moderate sky fog owing to low elevation. A Lumicon Deep Sky filter was used for this exposure. This negative is very thin apart from the nebulosity. The vignetting shown is not representative because in practice this mode has slightly more vignetting than the f/5.5 mode, yet this image apparently shows the least vignetting of all three focal reduction modes. This was probably due to use of the Lumicon DS which had the effect of virtually removing all sky fog and hence the perceived (but not real) amount of vignetting. This is an interesting image because it illustrates three things:
- How the perceived vignetting may be significantly reduced through use of a deep sky filter.
- How the GEG does indeed illuminate the entire 35mm frame even in this fastest mode of operation.
- How the 10" f/10 LX200 may be used to capture the entire Lagoon nebula on a 35mm negative, with room to spare.
|
f/10
|
f/6.5
|
|
f/5.5
|
f/4
|
Vignetting ComparisonIt is by no means ideal to have vignetting, however the vignetting produced by the GEG is what I would call 'manageable' - it may be either cropped out or removed by a technique in Photoshop. On the other hand the vignetting produced by the Meade / Celestron f/6.3 reducers is what I would call 'unmanageable' - no amount of digital 'trickery' will remove it and the image has to be cropped to be presentable. The result of such cropping is that the resulting image scale is no greater than would be achieved without the reducer. The sole benefit is focal reduction to f/6.3. I have owned both Meade and Celestron f/6.3 reducers (though not at the same time). The particular image below (scanned in identical fashion to those above) was taken through the Celestron device, though results through the Meade device are identical.
|
Vignetting produced by Meade / Celestron 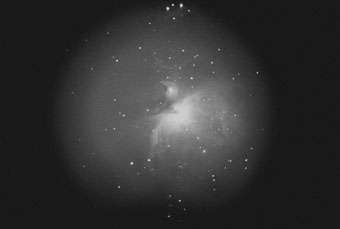
|
Sharpness
Aberrations produced by the GEG lens tend to increase in proportion to the degree of focal reduction and are only evident at the edges of the field in the two fastest modes - 'f/5.5' and 'f/4'. Even in the fastest mode of f/4, aberrations are confined to the outer 25% or so of the field. This high resolution crop from the central portion of IC1318 illustrates the degree of sharpness produced by the GEG lens in the fastest mode of f/4. Considering that the SCT design is not noted for being the being the sharpest available, and that the GEG lens introduces an additional optical system, the sharpness obtained here would appear to be acceptable. The slight red flare visible around some stars is due to use of a Deep Sky filter rather than chromatic aberration.
Options
This is a report on the various options available for the GEG. There are many options available and the decision on whether these may or may not be useful can be confusing for the new user.
- f/10 viewing adapter - very useful. This is an adapter that fits the rear cell of the LX200 in place of the GEG. It allows the LX200 to be used in normal f/10 mode, but without having to unscrew the 3" adapter ring and screw the original LX200 adapter back on every time - you just release the brass thumbscrews instead. I use it for all normal viewing, planetary photography, polar alignment, and whenever I stow the LX200 away - that way it fits the original foam cutout in the LX200 transport case.
- 2" to 1-1/4" adapter - very useful. This fits the rear aperture of the GEG and allows you to use normal eyepieces, RA prisms, etc with the GEG. I use it whenever (for a variety of reasons) I need to view (as opposed to photograph) something with the GEG or f/10 viewing adapter in place. Be aware that without this you can never use a 1-1/4" eyepiece unless you go through the rigmarole of screwing back the original Meade adapter. By using a combination of this adapter and the f/10 viewing adapter I have never once had to screw back the original Meade adapter.
- 1.3" - 4.5" eyepiece extension tube - mandatory for off-axis guiding in both f/6.5 and f/4 modes. Providing that the Lumicon original is specified then this single extension tube works well for both f/6.5 and f/4 modes.
- Camera adapters - Lumicon suggest that you need a special camera adapter for each different type of camera you will use. In fact the only special part is a flange which fits into the standard T adapter for your camera. It may be worth asking Lumicon if you can buy just the flange part on its own, then fit it to your existing T adapter. You will need as many flanges as you have different camera bodies, because you will not want to waste time changing a single flange between different T adapters every time you want to change a camera body.
- 2" camera extension tube - necessary for f/4 mode. This fits into the rear aperture of the GEG and has the effect of moving the camera 2" further back, thus achieving f/4.
Summary
As an off axis guider the Lumicon GEG is superlative. As a focal reducing instrument it is a compromise in as much as it is a substitute for the ideal solution of having a collection of telescopes of varying focal lengths and f/ratios. For some this ideal may be prohibitive either on cost grounds, or because of the difficulty of transporting a collection of telescopes to a remote dark sky site. In reality there is no such thing as the Holy Grail of having 'many telescopes in one' but the GEG comes closer than any device I have used or heard about. In the fullness of time those of us who are really obsessed with perfection will expand our collection of telescopes in an attempt to cover the entire astrophotographic range by means of dedicated instruments. In the meantime the GEG is an interesting alternative.
How close to the 'Holy Grail'?
|
GEG at f/10 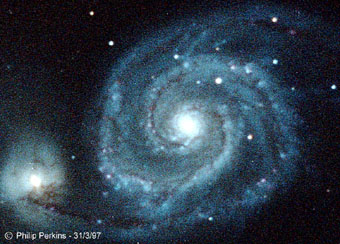
|
GEG at f/4 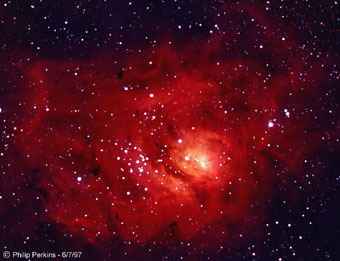
|
Yes, I cheated a bit - the f/10 image is cropped far more than the f/4 one! <G> ... Well, you can easily work out the true image scale difference between f/10 and f/4 - I thought it might be more interesting to show what is actually achievable ...
|
|
|
|