Nikon LS-1000 Super Coolscan
Polaroid Sprintscan 35 Plus
I wish I could have had access to comparative scans of astronomical negatives at the time that I was making a purchase decision. Commercial scanners are obviously optimised for the mainstream market,and their performance when presented with thin contrasty astronomical negatives has the potential to yield dramatically different results. Recently, through a very co-operative dealer, I was lucky enough to obtain scans of the same negatives on both the Coolscan and Sprintscan. I thought I would share this information for the benefit of others. I have also had 21 of my negatives scanned by PhotoCD, so I have included notes on these results. The comparative images are based only on the Coolscan and the Sprintscan, since I did not scan any of the PhotoCD negatives during the brief time that I had the Coolscan.
I compared scans of a couple of difficult negatives - this was purposeful, because sometimes in astronomical imaging, the very best we can get is a very thin negative. In all cases I tried as best I could to optimise the scan using the scanner's controls. None of these images was touched in any way by Photoshop, other than to resize the image - they are pure output from the scanners.
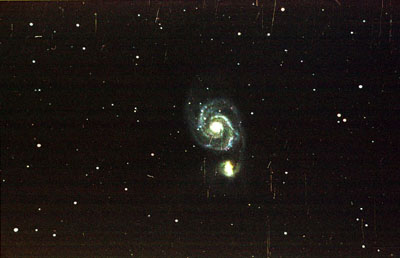
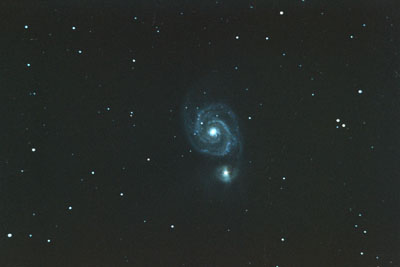
The following scans are from a thin test negative of M51 - the exposure was only
50 minutes - cut short by the rising moon. This is not the same negative as shown
on my images page. The negative had some light scratches (put there by the French
photo lab).
|
|
|
|
Nikon LS-1000 Super Coolscan |
Polaroid Sprintscan 35 Plus |
It is difficult to believe that these scans are from the same negative. The light scratches are not only made fully visible, but seem to be actually amplified by the Coolscan. Notice the M51 'spokes' - at 6 o'clock and 7 o'clock positions, which are caused by very light scratches.The Coolscan image is already way overcooked and there is nothing that could be done in Photoshop to retrieve it. Believe it or not, I tried very hard (including an hour long consultation with Nikon tech support) to optimise this scan. Although I tried hard with the contrast, curves, and brightness, they made very little difference - the big killer was lack of any control over exposure (apart from kludging it). Notice also the banding visible on the Coolscan image - this appeared on most scans of thin negatives. The Sprintscan image is suitable for further enhancement (and colour balance) in Photoshop and a fairly decent image could be made out of it, although because of the thin negative it will never yield an optimum image.
 |
 |
|
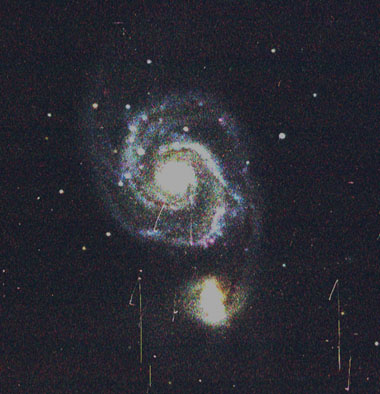
Nikon LS-1000 Super Coolscan |
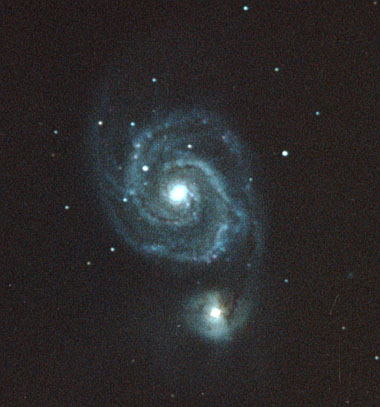
Polaroid Sprintscan 35 Plus |
In a further attempt to get optimised scans I used the scanners controls to select and scan only a portion in the centre of each negative. In each case I used the scanners controls as much as possible to get the very best out of the image, as though I had no recourse to further imaging enhancement software. In the case of the Coolscan image, the scanner automatically set the contrast to a very high level and the exposure to a very low level and there was no means using the scanner's controls to correct these values any more than is shown. In the case of the Sprintscan image, I purposely overdid the contrast to try to yield an optimum image, with the result that the core of the galaxy is blocked up. With the contrast at a more reasonable level, the image shows excellent gradation right into the core.
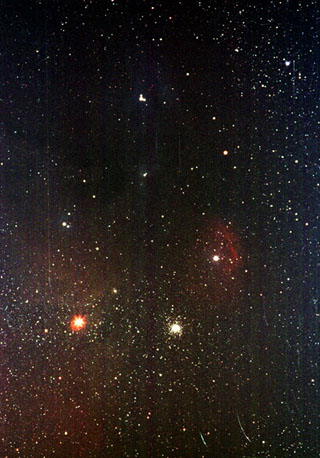
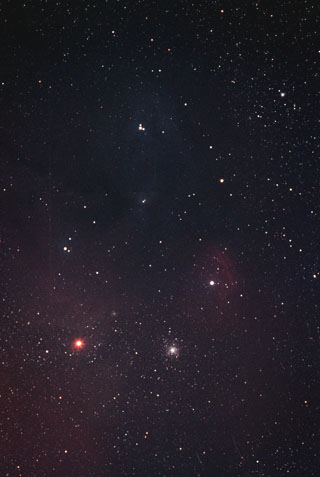
The following scans were from another very thin negative of the Antares - Rho Ophiuchus region - one of the two negatives used in the image on my Images page. It too had some light scratches (put there by the French photo lab).
 |
 |
|
Nikon LS-1000 Super Coolscan |
Polaroid Sprintscan 35 Plus |
Very similar comments apply as above. The banding in the Coolscan image is even more visible. Again, the Coolscan image is so overcooked that nothing in Photoshop will redeem it. Was this an unfair test? I don't think so - theSprintscan image is fully useable, and this was one of a pair of scans that formed the digitally double-stacked image of the Antares region on my Images page.
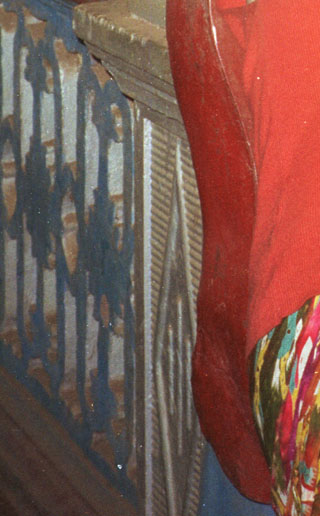
Was there something wrong with the Coolscan? I really don't think so (and Nikon tech support didn't think so either) - it automatically produced beautiful scans of any regular negative material. Here is a small section of a negative (taken with a cheap snapshot camera) and scanned with the Coolscan - exposure was perfect and no scanning defects were visible at all. This image was not touched by Photoshop other than to crop and resize it - it is straight output from the Coolscan using entirely automatic settings.
|
|
|
|